
PostGIS is a robust and reliable spatial database extension for PostgreSQL. With this tool, we can store our spatial datasets in an RDBMS database such as PostgreSQL. There are many benefits when we store our data in PostGIS. By utilizing PostGIS, the spatial dataset will be available for multiple users, esay to manage etc. In this article, I am going to guide you how to build a powerful PostGIS database using Debian 10 Buster.
To install PostGIS on Debian 10, we need to do the following steps:
- Install Debian 10 (skip if you have it already)
- Update System
- Install PostgreSQL
- Install and Configure PostGIS
- Test
Let’s start.
Install Debian 10
First, download and install the latest Debian 10 on your PC or virtual machine. For this tutorial, I installed Debian 10 on my Virtualbox. You can download the Debian 10 ISO file using this link below:
https://www.debian.org/distrib/
Update System
Next, we need to make sure that our system is up to date. Use this command to update Debian 10.
sudo apt update && sudo apt upgrade
Install PostgreSQL
PostgreSQL 11 is available in Debian 10 repository. So, we can install it directly from command line.
sudo apt install postgresql-11
Now, make sure PostgreSQL is up and running
sudo systemctl status postgresql
Output:

Now login to postgresql and change the postgres user password. postgres is the default admin user for PostgreSQL.
Switch to postgres user
sudo su - postgres
Now login to PostgreSQL console using psql command
psql
Change the postgres password using this command
\password postgres
You will need to enter the new password twice. At this point, we have successfully install PostgreSQL server and set the postgres password.
Enable Remote Access on PostgreSQL
By default, the PostgreSQL server is accessible from localhost only. If you plan to use the PostGIS across your local network or even the internet, we need to modify some settings to enable remote access.
Edit the postgresql.conf using your favorite text editor. In this case, I use nano.
sudo nano /etc/postgresql/11/main/postgresql.conf
Add the following line below the Connections and Authenticatiosn section of the postgresql.conf file.
listen_addresses = '*'
Next, edit the pg_hba.conf file.
nano /etc/postgresql/11/main/pg_hba.conf
Under the IPv4 local connections: Find and change the following line:
host all all 127.0.0.1/32
change it into
host all all 0.0.0.0/0
Done. Now restart PostgreSQL
sudo systemctl restart postgresql
Install PostGIS Extension
The following command will install PostGIS extension
sudo apt install postgis

Install PgAdmin
We are going to install PgAdmin that will help us to create and manage databases and extensions via web browser.
sudo apt install pgadmin3
Now open PgAdmin 3 and create a new connection to your server.

Once connected, create a new database. Right-click the “database” and select New Database. Enter the new database name and click OK.
Enable PostGIS extension on a database
PostGIS extension is specific for a database. We need to manually enable this extension to a database. A newly created database does not automatically have the postgis extension enabled. So, we need to do it one by one if you have multiple databases.
Expand the database you want to install the postgis extension. Right-click on the extension and click New Extension

Next, select postgis from the drop-down list as follow

Click OK and now you should see postgis on the list
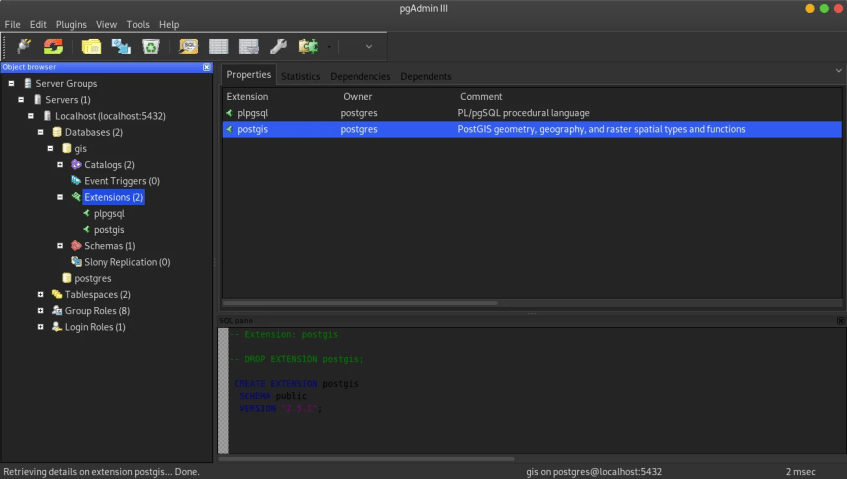
At this point, we have successfully installed PostGIS extension on a database. Next, we are going to test it.
Connect QGIS to PostGIS
Open QGIS software, and then right-click PostGIS >> Create New Connection. Enter the PostgreSQL database credentials including host (IP address), username and password.

Make sure you can connect to the server.
i followed your steps. i can connect from PostGIS and DB manager but trying to connect with giswater plugin i get error “could not retrieve connection parameters for connection: user name: password:”
Hi, I am facing the same issue; did you find a solution ?
Thanks
[…] Cara install PostGIS di Debian […]