
In this article, I am going to show you how to install MySQL Server on Ubuntu 23.04. This is the new interim release of Ubuntu codename Lunar Lobster. If you are planning to build a spatial database server using MySQL, you may follow this guide. MySQL supports spatial database storage. I will not discuss the MySQL spatial data types here. You can read about that topic at this link.
Steps to Install MySQL Server on Ubuntu 23.04
Step 1. Update System
Before we begin, let’s make sure our Ubuntu is up to date. Open Terminal or connect via SSH and execute this command.
sudo apt update && sudo apt upgradeStep 2. Install MySQL Server
Now use this command to install MySQL
sudo apt install mysql-serverOutput
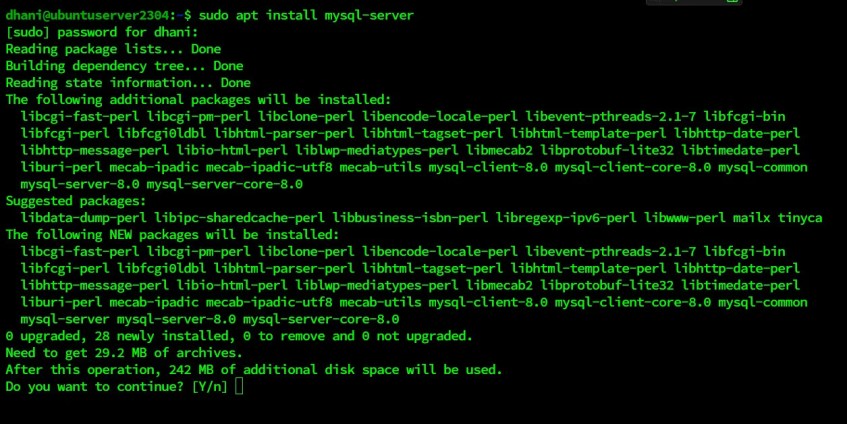
Wait until the installation is completed. Next, start the MySQL service and check the status
sudo systemctl start mysql
sudo systemctl status mysql
At this point, we have successfully installed MySQL Server on Ubuntu 23.04, but we still need to do some things.
Step 3. Configure MySQL
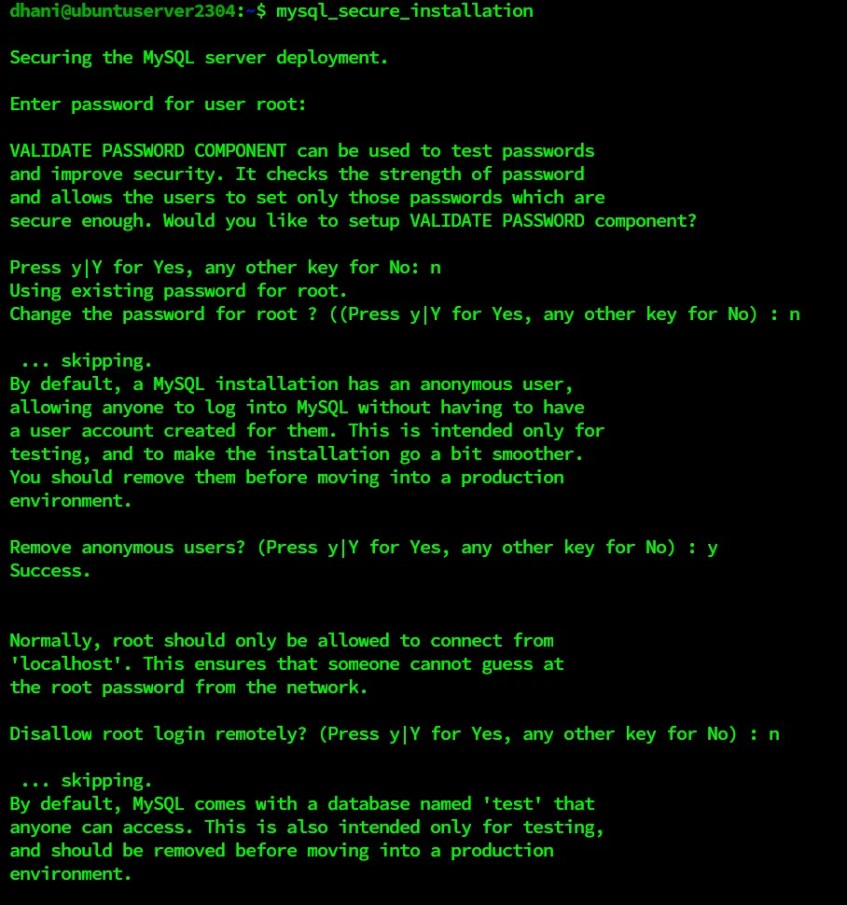
In the past, we need to execute the command “mysql_secure_installation” to change the MySQL root password. But now, we need to do some additional steps.
First, let’s open MySQL prompt using this command
sudo mysqlAnd then, use this command to change the MySQL root password. Don’t forget to change the “desired “password12345” with your own password.
ALTER USER 'root'@'localhost' IDENTIFIED WITH mysql_native_password BY 'password12345';To exit, simply type exit. Now we can run this command to secure our MySQL installation
mysql_secure_installationFollow the steps shown on your screen.
Now we have finished configuring the MySQL Server.
Step 4. Allow for Remote Connection
For some reason, we may need to access our MySQL server from a remote computer in the network. By default, MySQL only allows connection from the local host. We need to do the following to enable or allow for a remote connection.
sudo nano /etc/mysql/mysql.conf.d/mysqld.cnfNow find the line that says:
bind-address = 127.0.0.1Change it to
bind-address = 0.0.0.0Close and save the editor using CTRL + X and answer Y.
Now restart MySQL Server
sudo systemctl restart mysqlCreate a New User
Additionally, we can create a new non-root user for our MySQL Server. This user will have access to all the databases or specific databases only. Use this command to create a new user.
#Login to MySQL console using root
mysql -u root -p

#In the MySQL console, we will create a new user called dhani with password password123
CREATE USER 'dhani'@'localhost' IDENTIFIED WITH mysql_native_password BY 'password123';

#Optionally, we can also grant this new user to access all the databases
GRANT ALL PRIVILEGES ON *.* TO 'dhani'@'localhost' WITH GRANT OPTION;
FLUSH PRIVILEGES;
Please note that the user we created using the command above will be able to connect to MySQL Server from the local host only. If we want to enable or create a new user who can access the server remotely, we need to do it using this command.
#Log in to MySQL Console as root
mysql -u root -p

#Create a new user
CREATE USER 'dhani'@'%' IDENTIFIED WITH mysql_native_password BY 'password123';
GRANT ALL PRIVILEGES ON *.* TO 'dhani'@'%' WITH GRANT OPTION;
FLUSH PRIVILEGES;
exit
Now user dhani can connect to the MySQL Server remotely.
Thanks for reading this article to Install MySQL Server on Ubuntu 23.04. Subscribe to our blog to get more information like this.
Ty for the writeup. Simple and effective. Everything worked.
For those fighting a weird bug in Ubuntu where MySQL does not install w/ this error:
mysqld: error while loading shared libraries: libprotobuf-lite.so.32: cannot open shared object file: No such file or directory
do this (this is example from my Vagrant file):
export DEBIAN_FRONTEND=noninteractive
apt-get -y install /vagrant/mysql-apt-config_0.8.26-1_all.deb && apt-get update && apt-get install -y mysql-server
Somehow this fixes the broken shared library dependency.
Hi,
I am in the middle of installing the Lemp stack but a php script I want to test requires mysql (as opposed to mariadb), Does anyone know how to correctly install mysql with nginx as opposed to apache? I am using Ubuntu 23.04.
Regards,
Brian
[…] Server on my Linux server. If you don’t have the server yet, you can follow this guide to install MySQL Server on Ubuntu. Of course, we can use any other distribution or operating […]