Welcome to Global Mapper Tutorial for Beginners. In the following article, we are going to show you how to connect Global Mapper to Oracle Spatial Database. The Global Mapper supports various spatial database including PostGIS, MySQL Spatial, Oracle, SQL Server as well as ESRI File Geodatabase. In the previous article, I have written some tutorials about Global Mapper and PostGIS.
Oracle Spatial is a spatially enabled database that can be used to store spatial datasets to the Oracle Database. First of all, I would recommend you to read the following article to get started with Oracle Database Installation and Configuration.
- Install Oracle Database 19c on CentOS 8
- How to Install Oracle Instant Client on Windows 10
- Configure Oracle ODBC on Windows 10 (optional)
So in this article, I assume you already have Oracle Database, and Oracle Instant Client installed and configured in your system. Additionally, you may need to add the tnsnames.ora file to your instant_client folder.
Modify the oci.dll
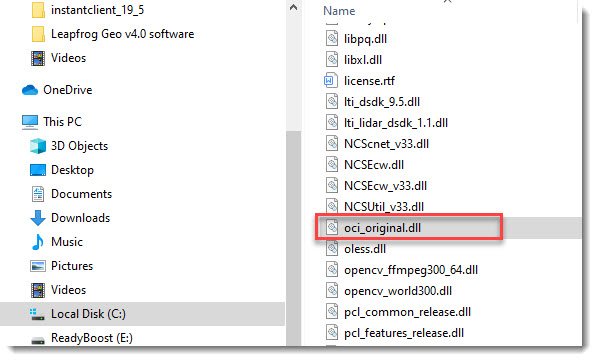
In order to get this to work, we need to rename the file called oci.dll in the Global Mapper installation directory. Rename the oci.dll into oci_original.dll. By doing this, GM will use the oci.dll that is in the instant_client directory.

Create a new Spatial Database Connection
After that, open Global Mapper and do the following steps to create a new database connection.
- Go to Tools >> Connection Manager
- Click New
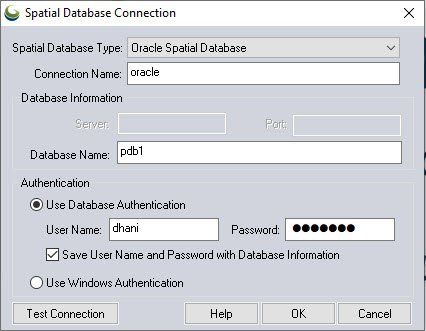
- Choose Oracle Spatial Database from the Spatial Database Type
- Give a connection name
- Type the database name, user and password
- Click Test Connection and make sure it is successful.
- Click OK

Open Oracle Spatial Table on Global Mapper
To open a table or layer from the Oracle database, follow these steps:
- Go to File >> Open Spatial Database
- Select the Oracle connection
- Confirm the user and password
- Select the layer to open. You can open multiple layers at once
- Specify layer bound if necessary

