
In the previous article, I have shown you how to create or import the elevation grid into Topography in Leapfrog Geo. And now, in this tutorial, I am going to show you how to create topography from a contour file. You may have a contour file in Tab format (Mapinfo) or .str format (Micromine) as well as Shapefile (.shp). The good thing is that Leapfrog can load those types of files and then generate the topography from that file.
Step 1. Import the Contour file
First thing first, prepare your contour file and make sure that the file has the elevation, easting and northing information in the attribute. We will use the elevation column to generate the topography in Leapfrog. Right-click the GIS Data, Maps, and Photos >> Import Vector Data. Select the GIS contour file that has an elevation column in it. Click Open.
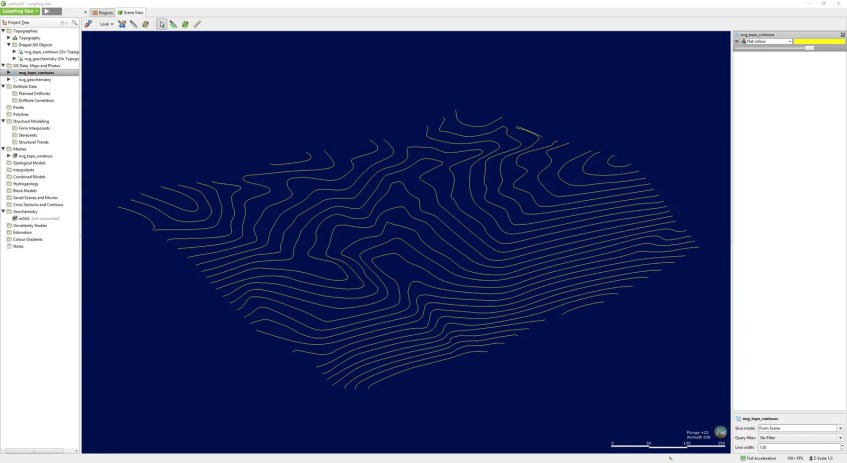
If you drag the contour file, it will be shown in the picture above.
Step 2. Create a New Mesh
In the following step, we are going to create a new triangulated mesh from the contour file. To do this, right-click the Meshes>>New Triangulated Mesh>>From GIS Vector Data

Select the GIS contour file and specify the extent of the new mesh. Give a name and then click OK. In a few moments, the new mesh is ready.
At this point, we have successfully created a new mesh from the GIS vector file aka the contour file. Next, we are going to create a new topography from this mesh.
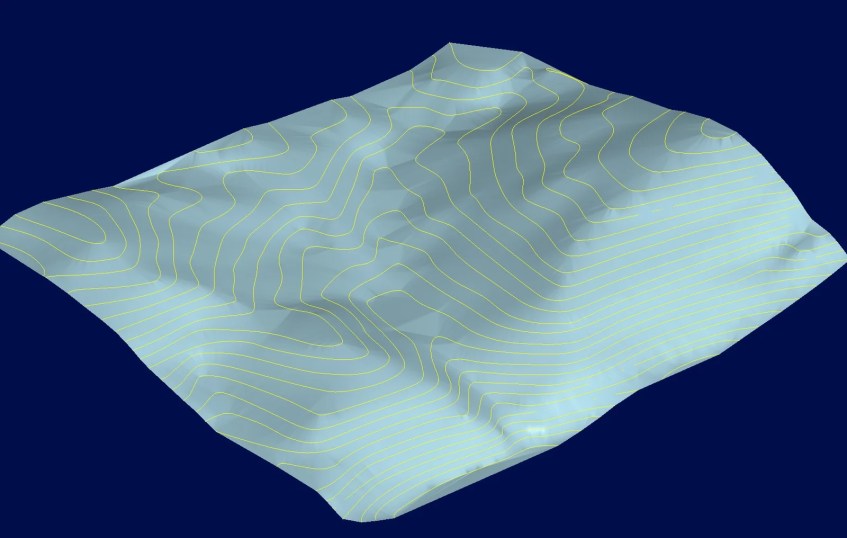
Step 3. Create a New Topography from Mesh
To create a new topography from the mesh, right-click the Topographies>>New Topography>>From Surface. Next, select the surface (mesh) we created earlier and click OK. Give a new name for the topography.
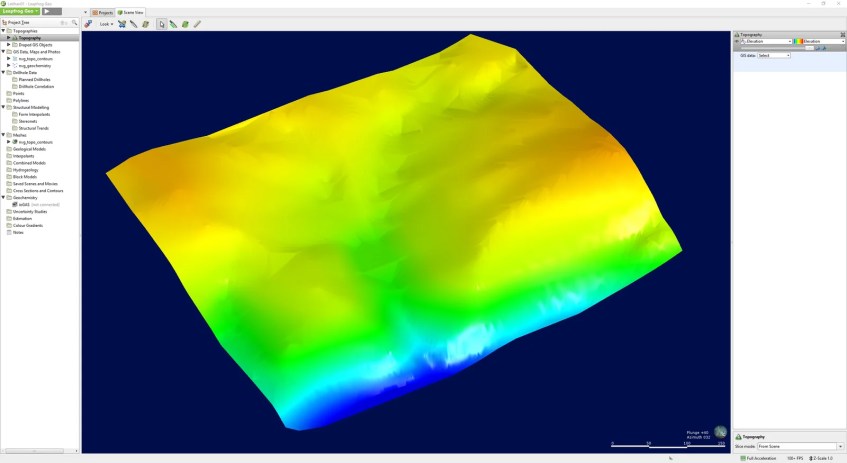
Done. Watch the following video to watch the entire process.
Hi, I’ve created contour lines in ArcMap from a SRTM image, thus generating a shapefile. When I try to import it into LeapFrog, all the datapoints come together (it seems like the shapefile only have elevation info but no north and easting attributes). How can I solve that?
Thanks!
Hello,
The contour line does not have to have the easting and northing because it’s line geometry. Also, a shapefile can only contains a single geometry. It will not mixed up with other geometries in the same file.
If possible, can you post screenshot of your original shapefile in ArcMap and after you import it to Leapfrog. I think you should inspect your shapefile and make sure it is line and has elevation information in it before importing to LF.
When importing shapefile to Leapfrog, don’t forget to set the “Elevation Field” to the correct column in your shapefile that store the elevation or Rl information.
Thank you
Hi! Please consider the following screenshots. Notice that I’m correctly selecting the elevation when importing to LeapFrog. Any clue on how to solve this? Thanks a lot for the help!
ArcMap screenshot = https://snipboard.io/TRQDKP.jpg
LeapFrog screenshot = https://snipboard.io/BmeOU7.jpg
Hi, thanks for replying. One last thing that you can check is the coordinate system. I can see from the attribute table, the shape_length value its very small number, 0.003008 etc. This can’t be right.
So make sure your coordinate system is correct. Leapfrog cannot use the Geographic (Long Lat) coordinate system.
If your contour is in local coordinate system, make sure that you are using meters. Maybe I cannot explain it correctly but I think you know what I mean.
Cheers
nevermind, just solved it! thanks a lot for the support