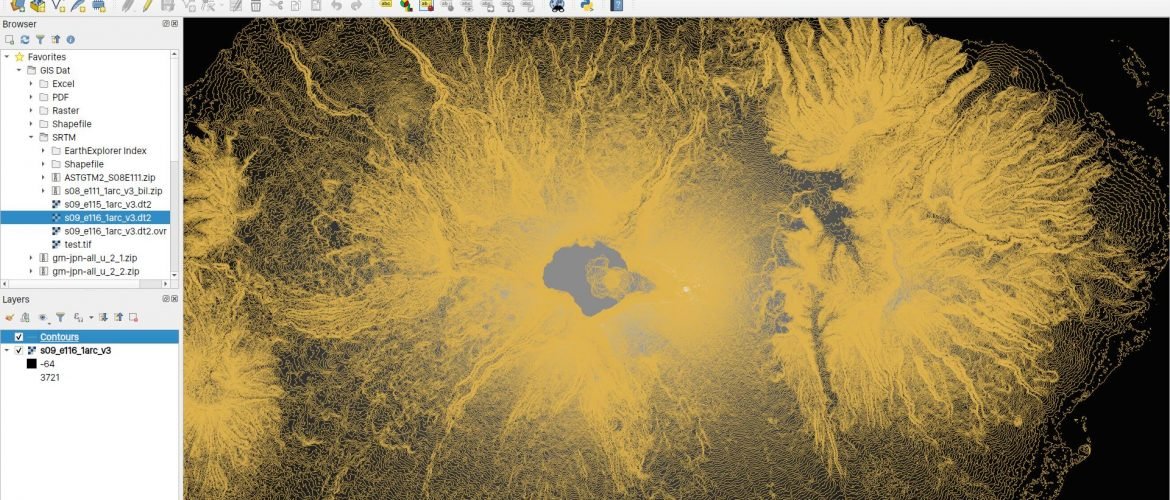
Hi, welcome to another QGIS tutorial. On this article, I am going to show you how to generate contours from SRTM data in QGIS. On my previous tutorial, you can learn how to download SRTM data from EarthExplorer as well as using SRTM Downloader in QGIS. So, after we have SRTM data loaded in QGIS canvas, we can do many things such as generating contours from the SRTM data. So this tutorial is basically will show you how to generate contour from a SRTM file. You may also interested on how to generate contour from SRTM using Global Mapper.
Steps to generate contour from SRTM Data in QGIS
Step 1. Create a new project
To create a new project, go to Project | New
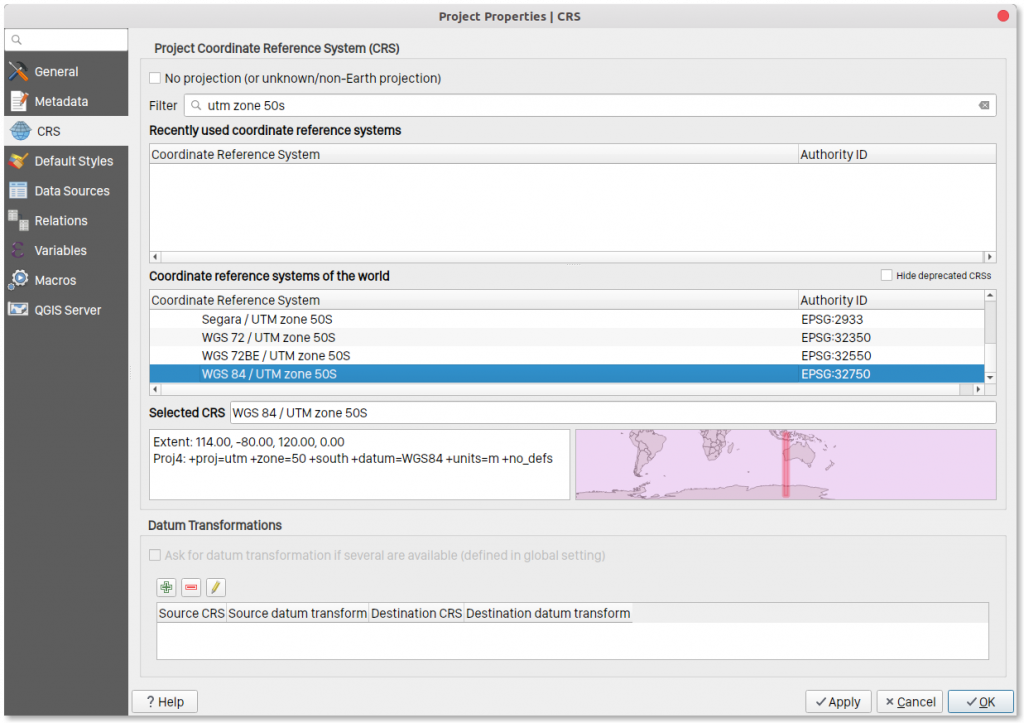
Step 2. Set the project CRS (Coordinate Reference System)
It is important to have a correct CRS in the project. You can go to Project | Properties and then click the CRS tab.
In this example, I am using the WGS 84 / UTM Zone 50S.
Step 3. Load the SRTM file
First, load or open the SRTM imagery to QGIS Canvas. You can do this by dragging the file from the left Browser panel in QGIS. You can read our previous tutorial if you want to download the SRTM data for your area of interest for free.
Step 4. Generate Contour from SRTM
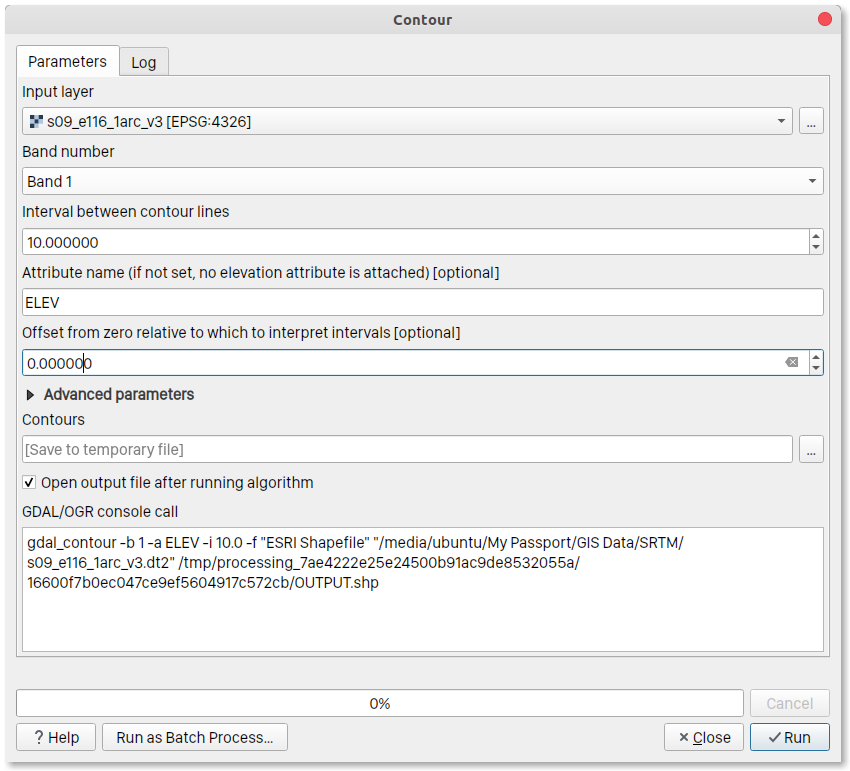
Go to Raster | Extraction | Contour. The contour creator window will open up. You will need to specify the following:
- Input layer – This should be your SRTM imagery
- Band number – band1
- Interval between contour – type the contour interval you want to generate
- Attribute name – field name for the elevation data
- Advanced parameters – You can specify the output contour file here. If you leave it blank, QGIS will create a temporary scratch layer.
Don’t forget to check the option “Open output file after running algorithm” to automatically open the contour layer to canvas. Click Run to start the process. In few moments, the contour should be ready.
The contour is now ready and if you open the attribute table, you will notice that this contour has elevation data. Thank you for reading this article on how to generate contour from SRTM file in QGIS. See you on the next tutorials.


